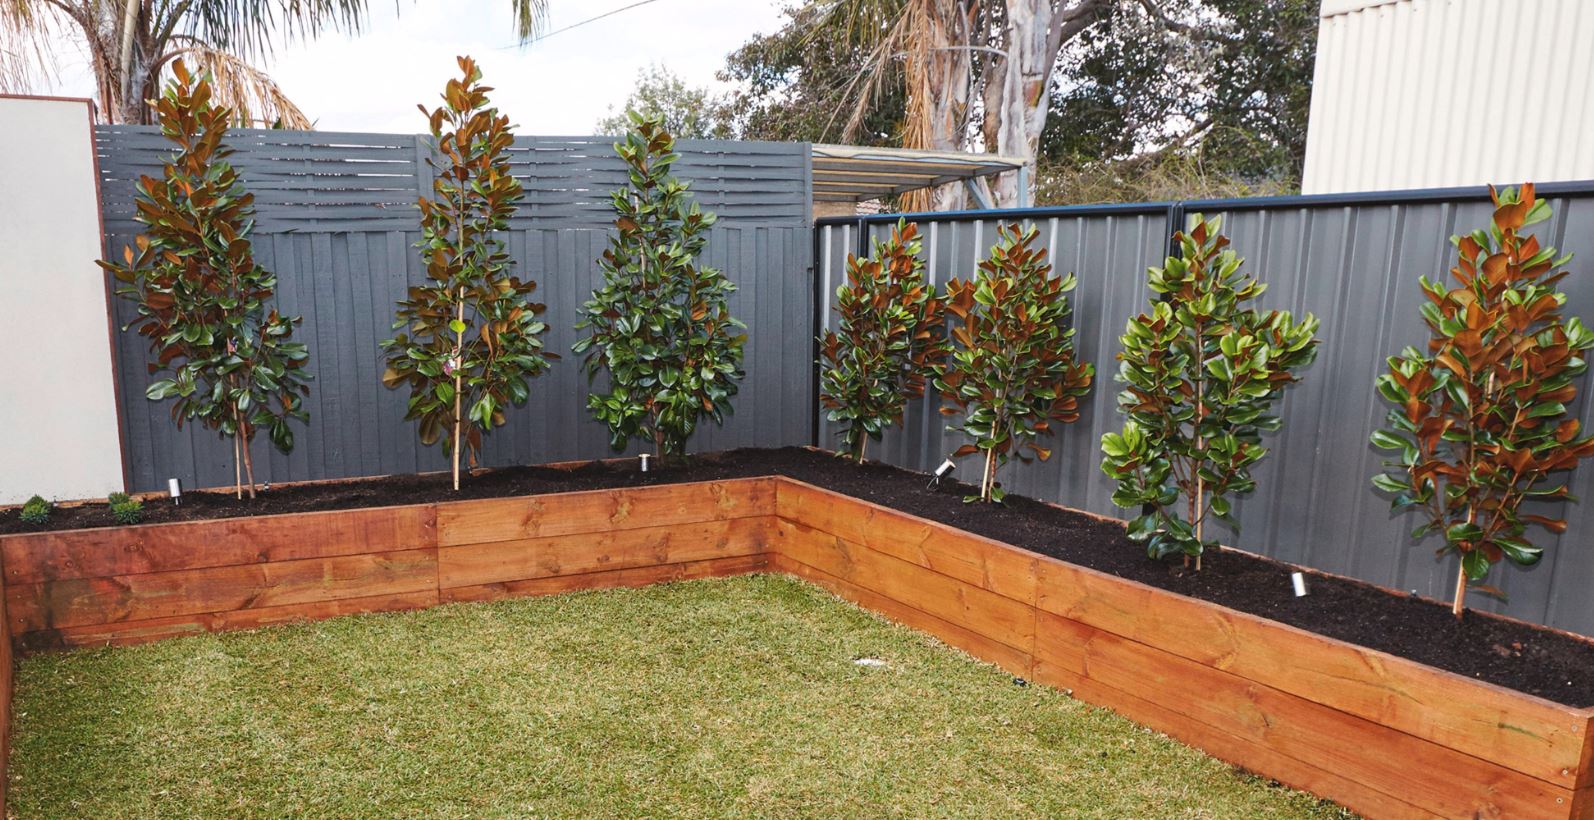
Raised Garden Bed Along The Fence
How to Build a Raised Bed Along a Fence
Raised garden beds are more efficient with space, offer better drainage, heat up more quickly than garden plots below soil grade, and let you keep complete control over the soil composition without improving subpar native soil. Anywhere in your outdoor area may be transformed into a raised bed, and constructing a fence allows you to keep the beds out of the way and provide a barrier between the yard and the fence. Since fence planks are frequently pressure-treated with chemicals that might seep into the garden and untreated planks can decay quickly when exposed to damp garden soil, raised beds must have four sides even if they are erected along a fence.
Tip
To ensure that the plants get the most sun exposure, build the raised bed along a fence that goes from north to south or east to west depending on where you live. The fence may shadow the raised bed for a number of hours each day if the bed does not run north to south, which would restrict the kind of plants you might grow.
To shield the plants from frost, you might make a hoop out of PVC pipe.
1 Get your measurements ready
The ideal length for the raised bed, which is typically around 8 feet long, may be determined by measuring the distance between the outside margins of two fence posts. The raised bed fits neatly and looks polished when it lines up evenly with the existing fence posts, even if you can make the fence longer or shorter than this dimension.

2 Cut Your Wood
For the posts, cut four pieces of 100mm × 100mm wood to 40cm lengths using rot-resistant wood like redwood or cedar.
If you want to align the raised bed with the existing fence posts, measure four pieces of 5cm by 15cm timber at 2.4 metres in length. To the necessary depth, or around 60cm to 120cm in length, cut four more pieces of 5 cm by 15 cm timber. This depth enables you to readily access plants or vegetables in the garden without trampling on the soil or compacting it.
3 Develop Your Posts
Utilizing a power drill and 9cm wood screws, attach two of the 5 metre 10cm x 10cm posts to either end of a long 5cm by 15cm board. Attach another of the long 5 cm by 15 cm boards with the other two 10cm by 10cm posts using screws. Work on a flat area with the posts upright to ensure that the boards and post ends are uniformly spaced.
4 Integrate Connecting Boards
Place the 5cm by 15cm planks on the ground with the posts parallel to one another. One brief 5cm by 15cm board is attached to either end of the two sections to form the rectangle.
To the posts that are directly atop the first course of 5cm by 15cm boards, screw the remaining long and short pieces of 5 cm by 15 cm timber. When complete, the 10cm by 10cm posts will stick out about 10cm to 12cm from the interior of the 5cm by 15cm wooden frame.
5 Make Post Hole Digs
To align the posts on the planter with the holes, dig four 12cm by 12cm post holes adjacent to the fence, spacing them apart by about 12cm.
6 A raised garden bed should be installed along the fence.
Place the bed in the post holes after flipping the elevated bed frame over so the 10cm by 10cm post legs are facing downward. With earth, plug the holes.

7 Secure the Fence
If more solidity is needed, screw the flower bed frame to the wood fence.
8 Level the Terrain
Make sure the ground is entirely flat by raking the soil inside the planter space. If you’re installing the planter in a grassy area, you must remove the sod layer first.
9 Add a Wire Mesh Hardware Cloth
Line the bottom of the planter with wire mesh hardware cloth, to prevent rodents and other pests from infesting the raised bed from below.
10 Plant Your Vegies and Flowers
Fill the raised bed with a mixture of equal parts sphagnum peat, finished compost, and perlite or sand. Plant your choice of crops or flowers in the raised planter bed.